

Zero to Hero –How to Onboard Microsoft Defender for Endpoint for MacOS with Intune – Complete Guide
Introduction
MacOS is no longer an exception in enterprise environments, it is part of the standard endpoint mix. As a result, Microsoft Defender for Endpoint on macOS has become a relevant component for organizations that want consistent visibility and protection across different platforms.
While onboarding Windows devices is well understood and highly automated, macOS follows different rules: system extensions, network filters …, and a tighter operating system security model.
In this article, we walk through onboarding Microsoft Defender for Endpoint on macOS using Microsoft Intune.
Onboarding Defender for Endpoint for MacOS with Intune
Decision Guide
Prerequisites
Before onboarding macOS devices into Microsoft Defender for Endpoint using Intune, a few prerequisites must be met, similar to windows devices.
Harware & OS Requirements
Hardware (minimums for supported editions):
Processor architectures
x64 (Intel)
ARM64 (Apple Silicon)
Disk space
Minimum 1 GB free disk space
Check if SIP is enabled with macos terminal:
Supported client operating systems :
macOS 26:Tahoe
macOS 15.0.1: Sequoia
macOS 14: Sonoma
Beta versions of macOS are not supported. New final macOS releases, however, are supported from day one. For more information take a look at: Microsoft Defender for Endpoint on macOS Prerequisites - Microsoft Defender for Endpoint | Microsoft Learn .
Network & Connectivity
For a detailed overview of all network requirements, allowed URLs, and connectivity considerations, please refer to: Zero to Hero – How to Onboard Microsoft Defender for Endpoint for Windows Clients – Complete Guide
For completeness, the following basic connectivity checks are highly recommended before deployment.
Test network connectivity (browser)
Open the following URLs from the macOS device:
https://x.cp.wd.microsoft.com/api/report
https://cdn.x.cp.wd.microsoft.com/ping
If access is not blocked, both URLs should return a positive response.
Validate connectivity after installation
Once Microsoft Defender for Endpoint is installed, connectivity can be validated locally using:
Intune
At this point, all prerequisites are met. Now we move on. The Intune part of the macOS onboarding process consists of five steps:
Download the official Microsoft configuration files
Approve required system extensions
Create necessary configuration profiles
Publish the Defender for Endpoint application
Deploy the onboarding package
Download configuration files
Microsoft provides official configuration profiles for Defender for Endpoint on macOS via GitHub.
These files cover:
Approve system extension
macOS requires explicit approval for system extensions. Defender for Endpoint relies on system extensions to provide endpoint detection and response capabilities.
Key identifiers used by Defender for Endpoint:
| Allowed System Extension | Team Identifier |
|---|---|
|
com.microsoft.wdav.epsext |
UBF8T346G9 |
|
com.microsoft.wdav.netext |
UBF8T346G9 |
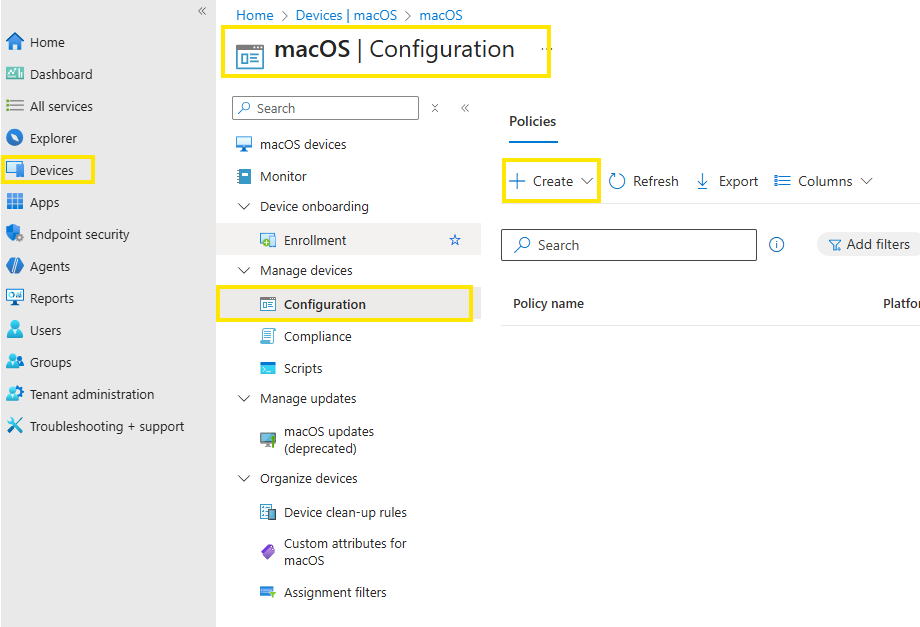
To approve the system extension, we create a intune policy. Navigate to intune admin portal into the MacOS section:
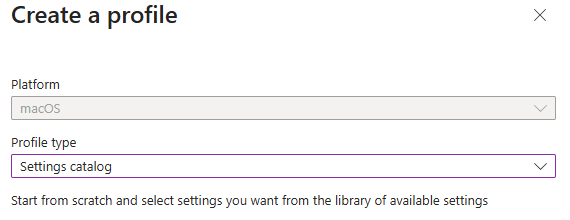
Create a new policy if type: settings catalog
In the Settings picker, expand the System Configuration category, and then select System Extensions and check Allowed System Extensions
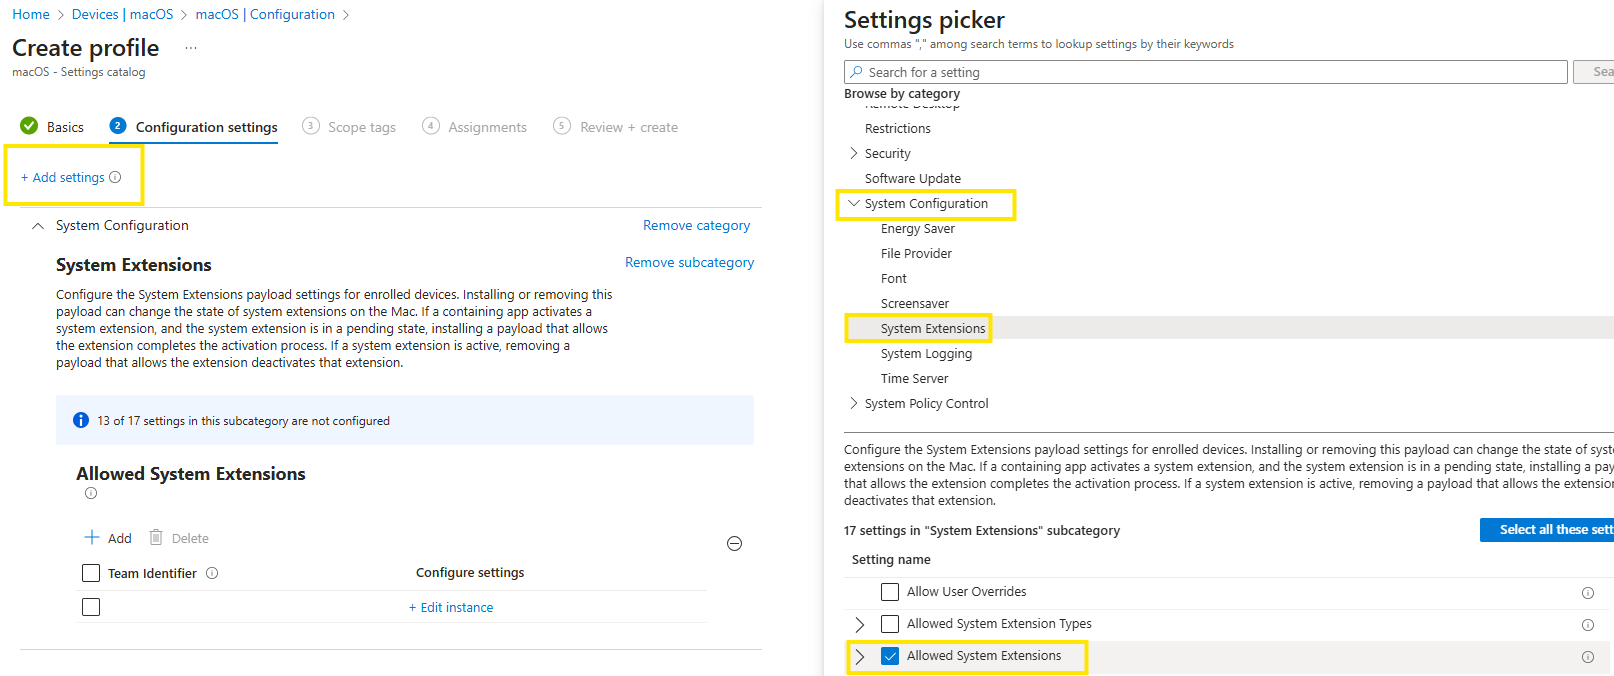
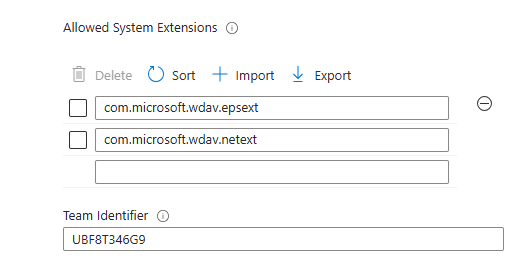
Configure the system extensions as shown in the table above. Assigne the policy to your macos devices
Create configuration profiles
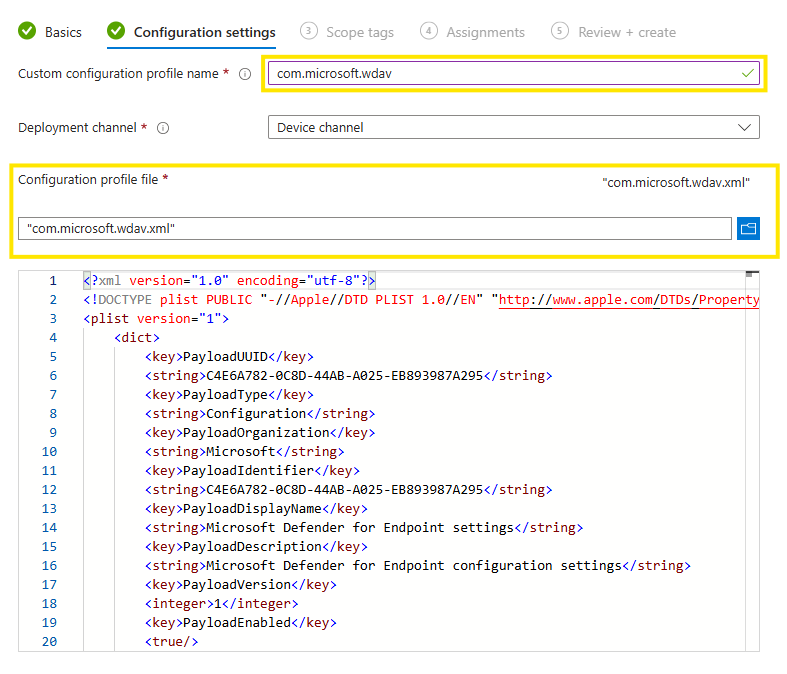
All macOS configuration profiles in Microsoft Intune follow the same creation process. For this reason, the procedural steps are shown only once. The focus then shifts to which configuration profiles are required for Microsoft Defender for Endpoint and why they matter.
It is important that all profiles are deployed, as missing one or more can result in limited functionality or incomplete telemetry. Profile‑specific notes and additional considerations are documented in the respective sections below.
Make sure the required configuration profile has been downloaded beforehand.
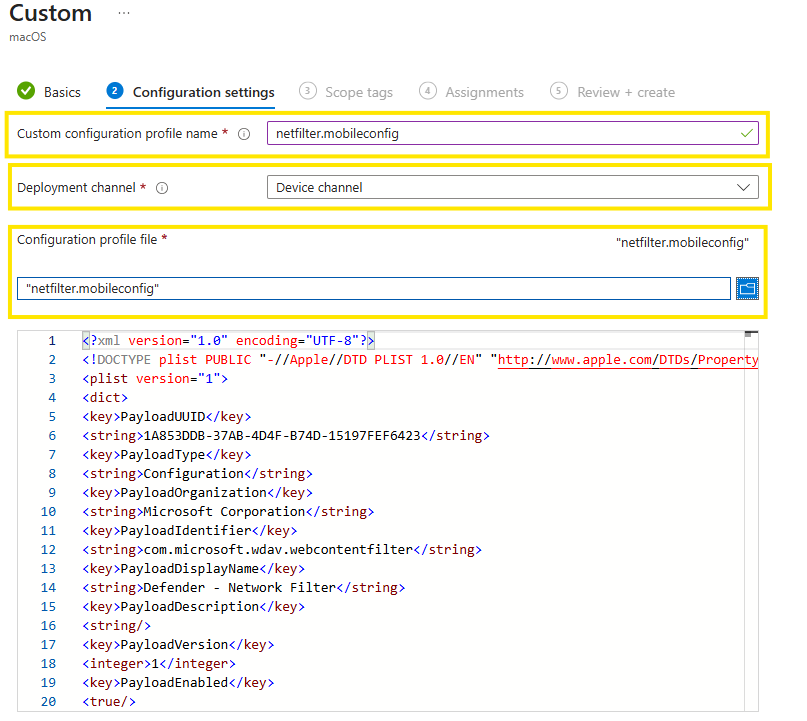
In the following example, the Network Filter profile is demonstrated, but the same procedure applies to all other profiles.
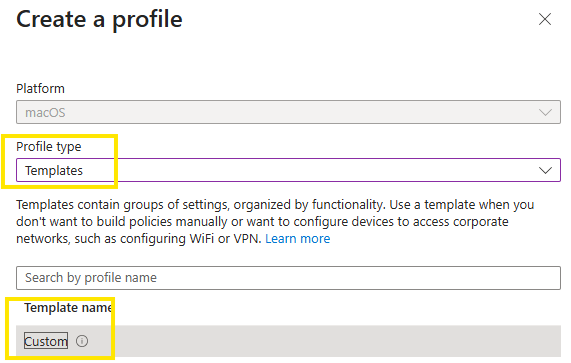

Create a new profile. Use a clear and descriptive policy name that reflects the profile’s purpose
Enter a custom configuration profile name. Best practice: use the original profile filename to keep naming consistent.
Upload the configuration profile file you downloaded earlier.
Assign the profile to the relevant devices.
Repeat this process for each required configuration profile until all policies are in place.
Required configuration profiles for Defender for Endpoint:
-
As part of its Endpoint Detection and Response (EDR) capabilities, Microsoft Defender for Endpoint inspects socket‑level network traffic on macOS. macOS supports only one active Network Filter profile at a time.
-
Starting with macOS Catalina (10.15), Apple introduced Transparency, Consent & Control (TCC) to protect user data. Applications must be explicitly granted Full Disk Access to inspect protected locations. If Defender for Endpoint was previously deployed without this profile, update the deployment and add this configuration profile
-
macOS 13 (Ventura) introduced additional privacy controls that prevent applications from running background processes without explicit consent. This profile grants the required Background Service permission. Older deployments configured before macOS 13 should be updated to include this profile to avoid broken behavior after OS upgrades.
-
This profile allows to display notifications to the user interface. End‑user notifications can be suppressed by setting ShowNotificationCenter from true to false.
-
This profile grants Microsoft Defender for Endpoint access to macOS Accessibility services (macOS High Sierra 10.13.6 and newer)
-
macOS 14 (Sonoma) introduced additional privacy controls for Bluetooth access. By default, applications cannot access Bluetooth hardware without explicit approval.
Microsoft Defender for Endpoint uses Bluetooth access only if Device Control Bluetooth policies are configured. Bluetooth permissions granted via MDM do not appear under System Settings → Privacy & Security → Bluetooth. This is expected macOS behavior.
-
This profile configures Microsoft AutoUpdate (MAU), which is responsible for keeping Microsoft Defender for Endpoint up to date. MAU supports multiple update channels: Beta (Insiders Fast), Current Channel (Preview) (Insiders Slow) and Current Channel (Production).
Best practice: Production endpoints should use the Production channel unless there is a clear need to validate features early
Optional: Configuring the Device Control setting, which is included in the MacOS Full disk access template. For more information about Device Control on macOS: Device Control for MacOS
Configure AV/EDR configuration options
In this approach, all Defender AV/EDR configuration is managed via Microsoft Intune using a custom configuration profile.
Copy and save as xml/Download the recommended or full configuration xml provided by Microsoft.
Create the custom Defender configuration profile in Intune:
Open the Intune admin center
Go to Devices → macOS → Configuration
Select Create → New policy
Profile type -> Templates -> Custom
Upload the xml file with the recommended profile.
Publish Defender application
With all required configuration profiles in place, the next step is publishing the Microsoft Defender application via Microsoft Intune. This installs the Defender agent on enrolled macOS devices and prepares it for onboarding into Defender for Endpoint.
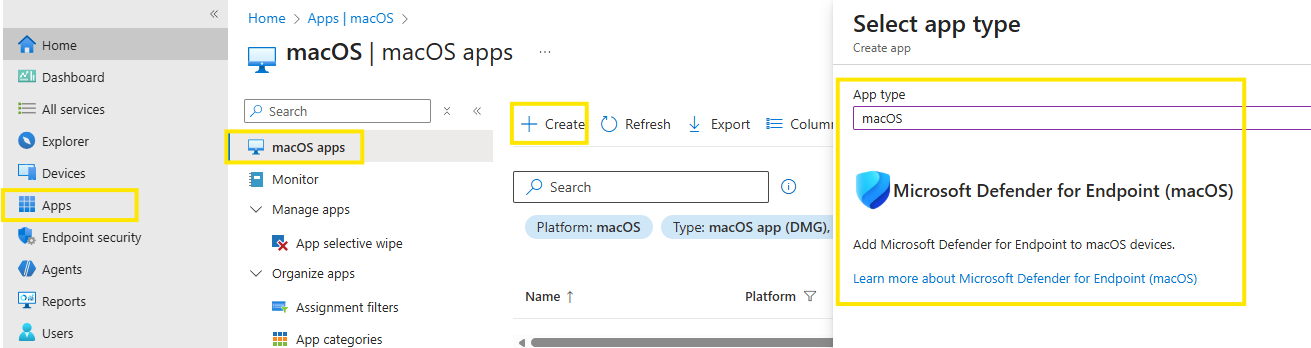
Open the Microsoft Intune admin center
Navigate to Apps
Expand Platforms, select macOS
Select + Create
Under App type, select:
Microsoft Defender for Endpoint → macOS
Assign the app to your devices.
Onboard MacOS using onboarding package
Publishing the Defender application installs the agent, but does not onboard the device into your Defender for Endpoint yet !
The final step is deploying the onboarding package, which contains tenant‑specific licensing and connection information.
Download the onboarding package
Open the Microsoft Defender portal (security.microsoft.com)
Navigate to
Settings → Endpoints → Device management → OnboardingFrom Select operating system, choose macOS
From Deployment method, select
Mobile Device Management / Microsoft Intune
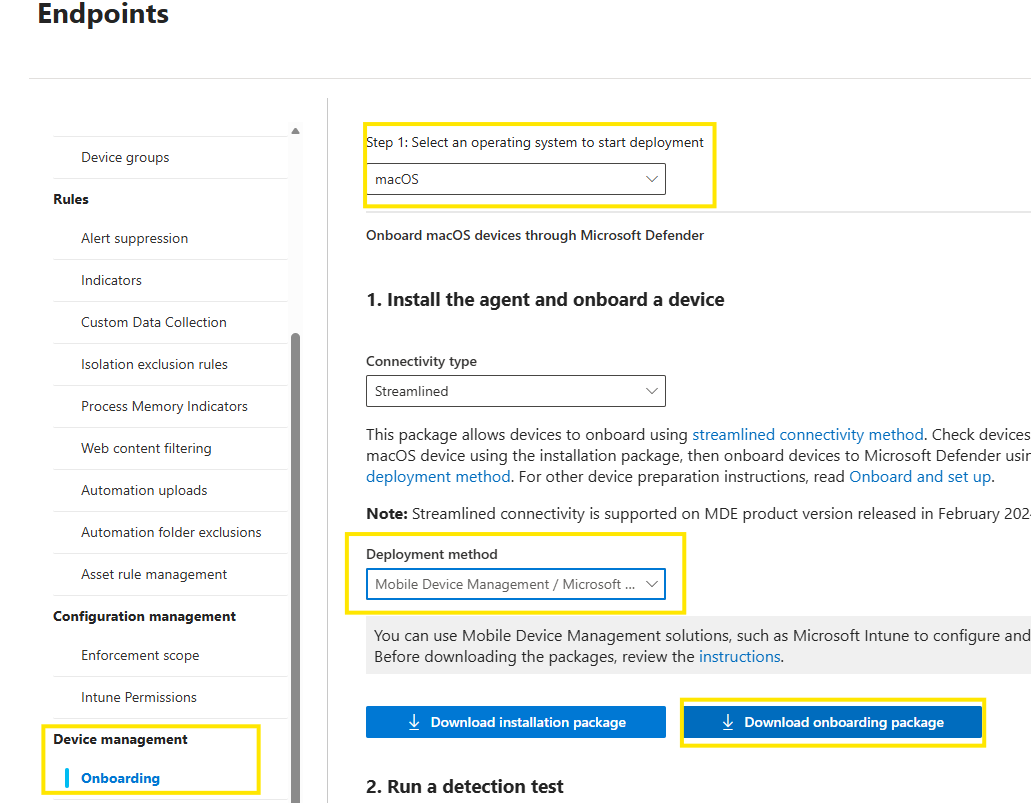

Save the zip file and extract the contents. You will find to folders
Deploy the onboarding package via Intune
This onboarding package is deployed as a custom configuration profile in Intune.
Open the Intune admin center
Go to Devices → macOS → Configuration
Select Create → New policy
Profile type -> Templates -> Custom
Configuration settings
Custom configuration profile name: Enter a name here
Deployment channel: Select the appropriate channel
Configuration profile file:
Upload WindowsDefenderATPOnboarding.xml from the intune folder
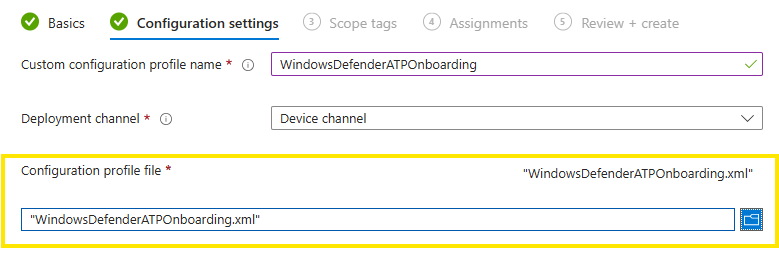
Assign and deploy the policy.
Conclusion
Onboarding Defender for Endpoint on macOS with Intune is straightforward if you respect the order and the details. Get the official macOS profiles in place, publish the Defender app as required, push the AV/EDR configuration and deploy the onboarding package. If you skip or miss a profile you’ll probably end up with a inconsistent devices.
With macOS onboarding completed, the next article will go a step further and focus on configurations for Defender for Endpoint. Stay tuned !